


Intro 📝
Microsoft's Visual Studio Code (VS Code) is a powerful code editor widely used by developers. However, it is primarily designed for Windows, Linux, and Mac OS, leaving Android users in the dark. Have you ever wished to run VS Code on your Android device? If so, you're in the right place! In this guide, we will walk you through the steps to install and use VS Code on your Android device, making coding on the go a reality.
Installing Requirements For VS Code ⚙️
To run VS Code on your Android device, you first need to set up a few essential tools. The primary tool is Termux, a terminal emulator that allows you to run a Linux environment on your Android device.
Start by installing Termux from F-Droid. It’s crucial to avoid downloading it from the Play Store, as the F-Droid version is more up-to-date and compatible with our needs.

Once installed, open the Termux application. You will see a command-line interface where you can execute various commands. The first command you need to run is:
apt updateThis command updates the list of packages available for installation. After successfully running this command, proceed to install the proot-distro package, which allows you to install a Linux distribution within Termux:
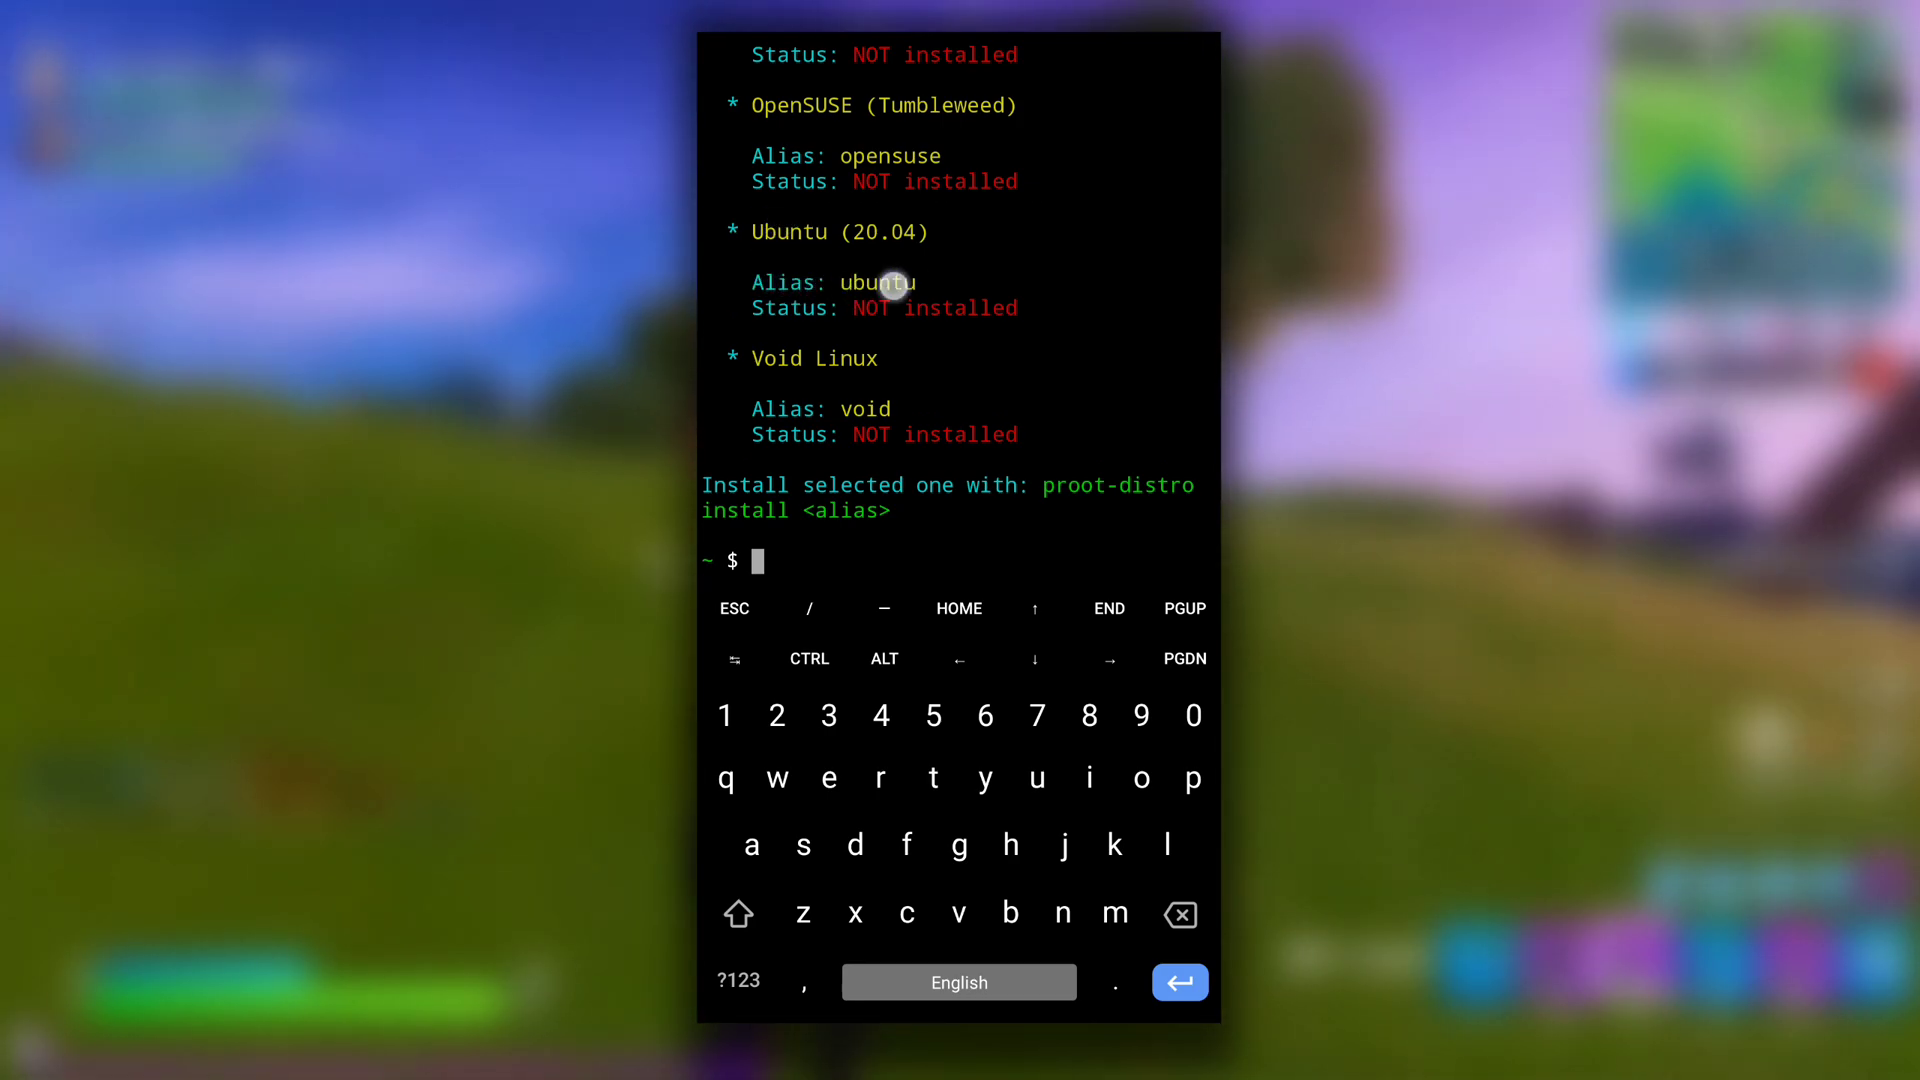
apt install proot-distroAfter the installation is complete, you can list all available Linux distributions by running:
proot-distro listThis will show you options like Void Linux, Ubuntu, and Fedora. For this tutorial, we will install Ubuntu. To do this, type the following command:
proot-distro install ubuntuThis command initiates the download and installation of Ubuntu. Depending on your internet speed, this process might take a few minutes.
Once the installation is complete, you’ll receive a confirmation message. Now, to log into the Ubuntu environment, type:
proot-distro login ubuntuIf you see the prompt change to root@localhost, you are successfully inside the Ubuntu system.
Downloading & Setting up VS Code 🖥️
With Ubuntu installed, the next step is to set up VS Code. First, update the package list again and install the wget package, which allows you to download files from the web:
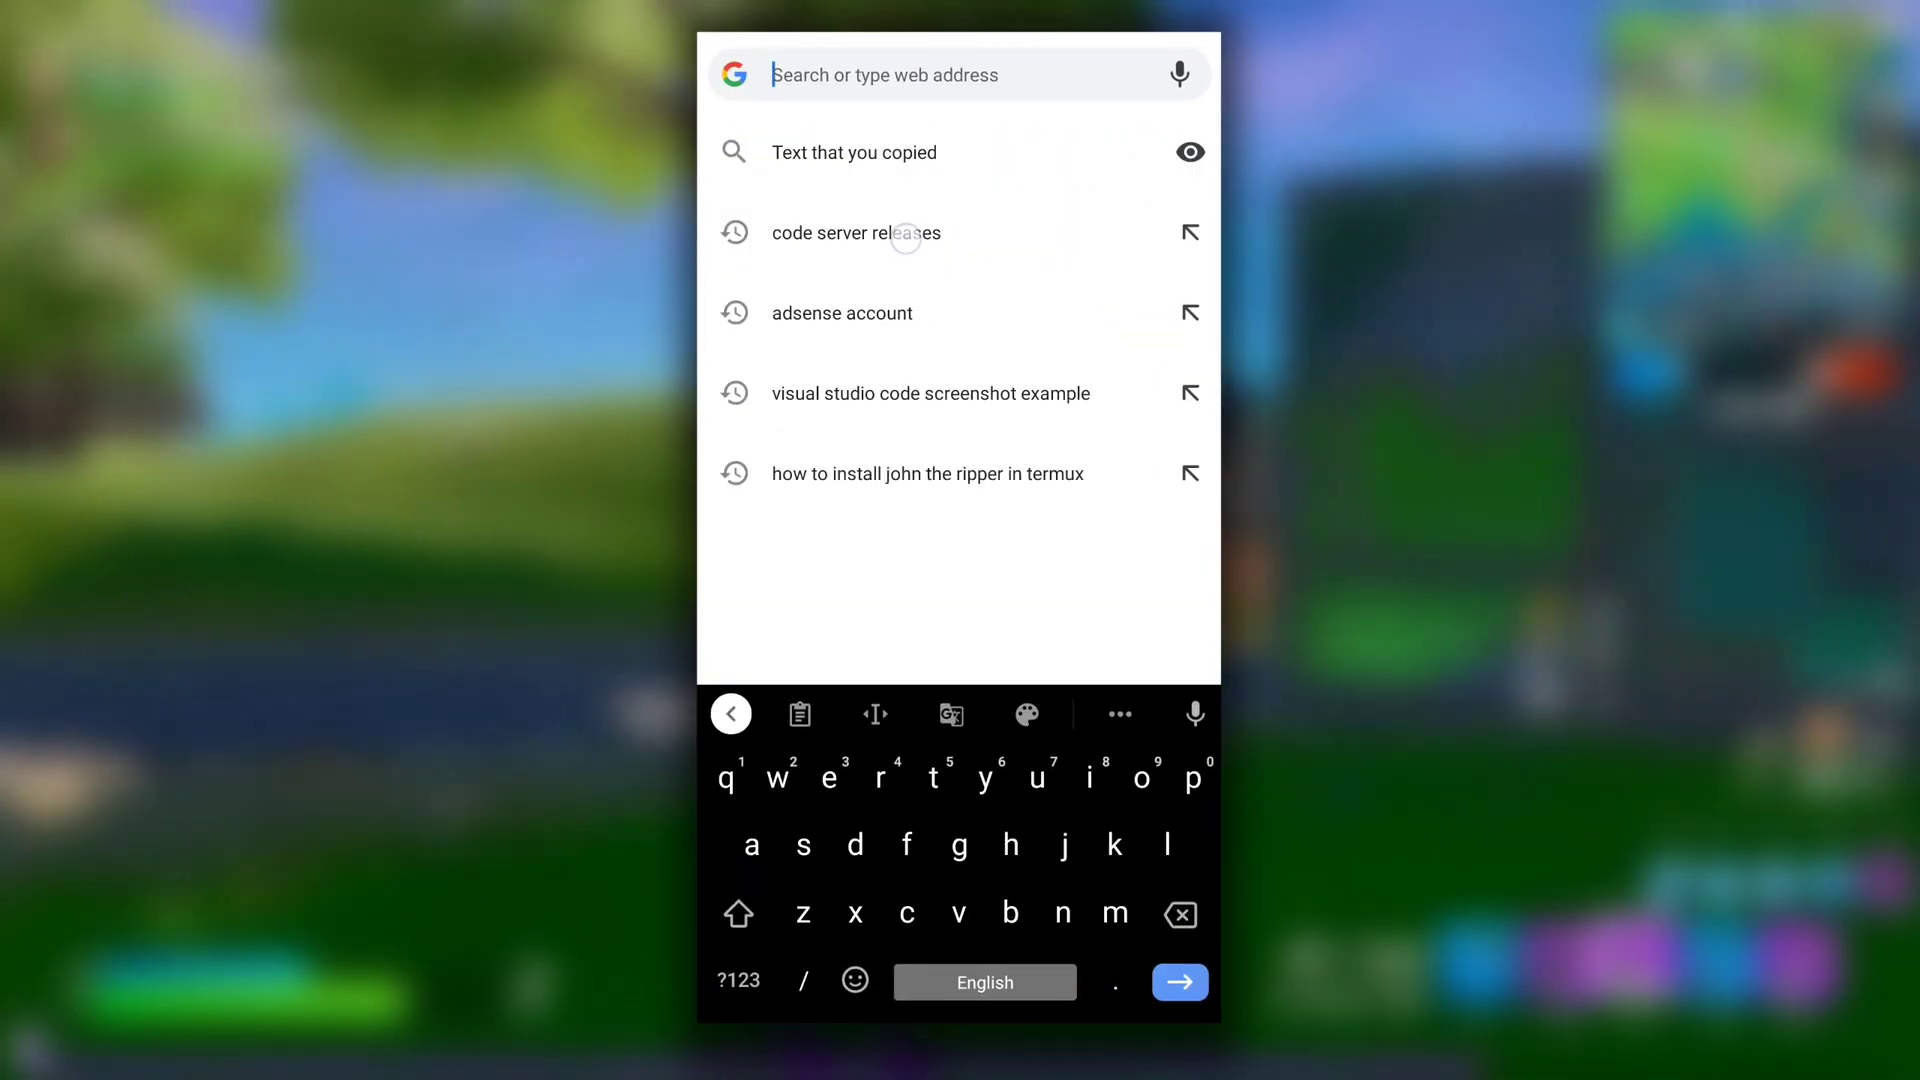
apt update && apt install wget -yAfter executing the above command, you can now download the code server, which is a version of VS Code that can run in a browser. Open a browser on your Android device and search for "code server releases." Click on the first link that appears, which will direct you to the GitHub repository.
Scroll down to the latest version (for example, 3.11.1), and click on the assets section. Long press on the code-server-3.11.1-linux-arm64.tar.gz link and select "Copy link address." This action will save the download link for the tar file.
Return to Termux and paste the copied link after the wget command:
wget [paste_link_here]This command will download the code server file, which is approximately 80MB. The download time will vary based on your connection speed. Once the download is complete, extract the tar file with the following command:
tar -xvf code-server-3.11.1-linux-arm64.tar.gzAfter extraction, navigate into the newly created directory:
cd code-server-3.11.1-linux-arm64Within this directory, access the bin folder:
cd binNow, set a password for your VS Code instance by typing:
export PASSWORD="your_password"For example, you might set it to 123 for simplicity. Finally, launch the code server with the following command:
./code-serverOpen a web browser and navigate to localhost:8080 to access your VS Code interface. You’ll be prompted to enter the password you set earlier.

Access files and folders from internal storage in VS Code 📂
At this point, you have a functional VS Code running in your browser. However, you may notice that you cannot access your internal storage, which limits your ability to work on projects effectively.
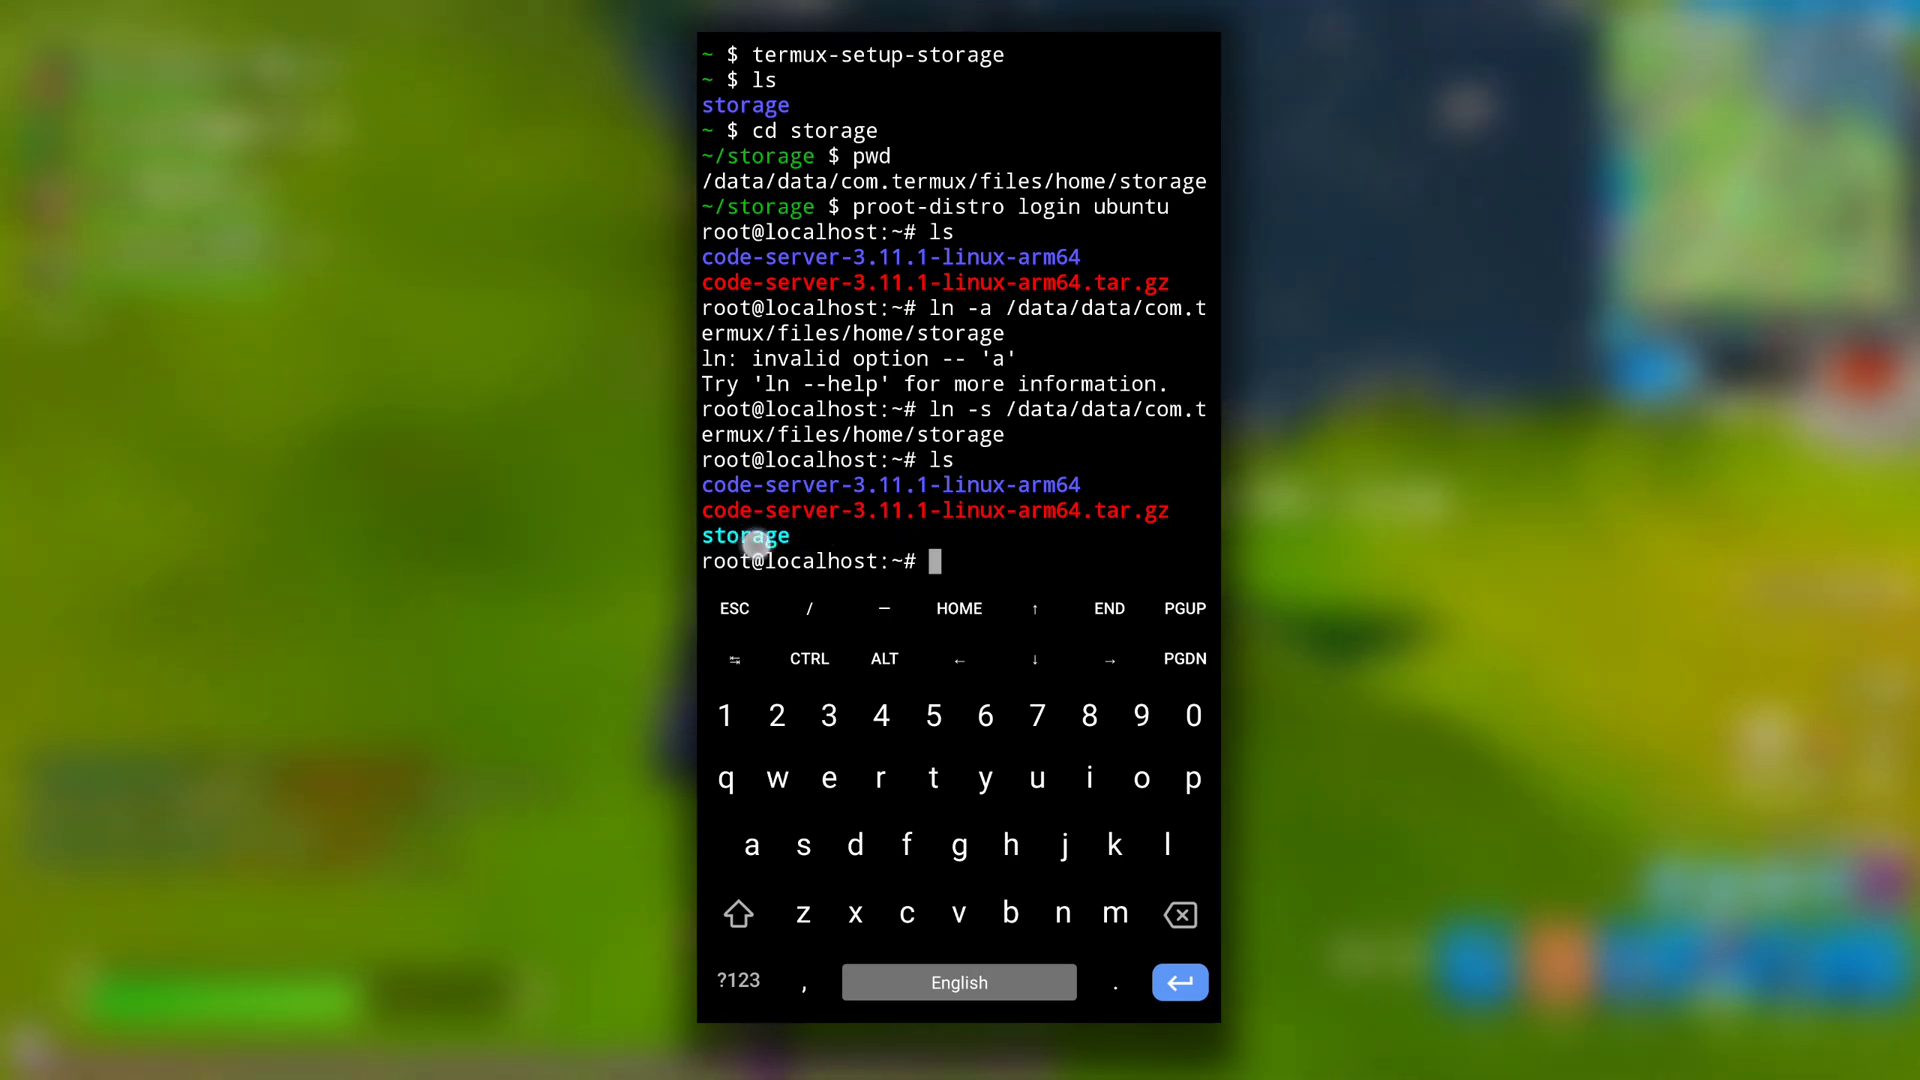
To enable access to your internal storage, return to Termux and create a new session. Type the following command to set up storage permissions:
termux-setup-storageHit enter and allow the permissions when prompted. You should now see a storage directory within Termux. Navigate into this directory:
cd storageUse the pwd command to print the path of the storage directory. Copy this path, and then log back into your Ubuntu session:
proot-distro login ubuntuNow, to create a symbolic link to your internal storage, use the following command:
ln -s [paste_storage_path_here]After executing this command, you should see the storage directory available in your Ubuntu environment. Switch back to the VS Code running in your browser, and you will now have access to your internal storage.
This access allows you to open, edit, and save files directly from your Android device, making VS Code a much more powerful tool on your mobile platform.
Conclusion 🎉
Congratulations! You have successfully installed and set up Visual Studio Code on your Android device. This setup not only allows you to code on the go but also gives you access to your internal storage, enhancing your productivity.
If you plan to use VS Code frequently on your Android device, consider investing in an external keyboard and mouse for a better experience. The default touchscreen keyboard may not be comfortable for extensive coding sessions.
For a complete list of commands used in this guide, visit AmanBytes and search for "VS Code in Android." You can find all the commands neatly compiled for your convenience.
We hope you found this guide helpful! Happy coding, and see you in the next tutorial!
