


In today's digital age, having a website is crucial for personal branding, businesses, or sharing your passion projects. This guide will walk you through the process of putting your HTML website online using GitHub Pages, a popular and free service. Additionally, we will cover how to set up a custom domain name to make your website easily accessible. Let’s dive in!
1. Put a Website on the Internet 🖥️
The first step in making your website accessible to others is to upload it to the internet. This is where GitHub Pages comes into play. GitHub Pages is a free service that allows you to host your website directly from a GitHub repository. It's user-friendly and follows best practices for web hosting.

Upload Our Code to GitHub
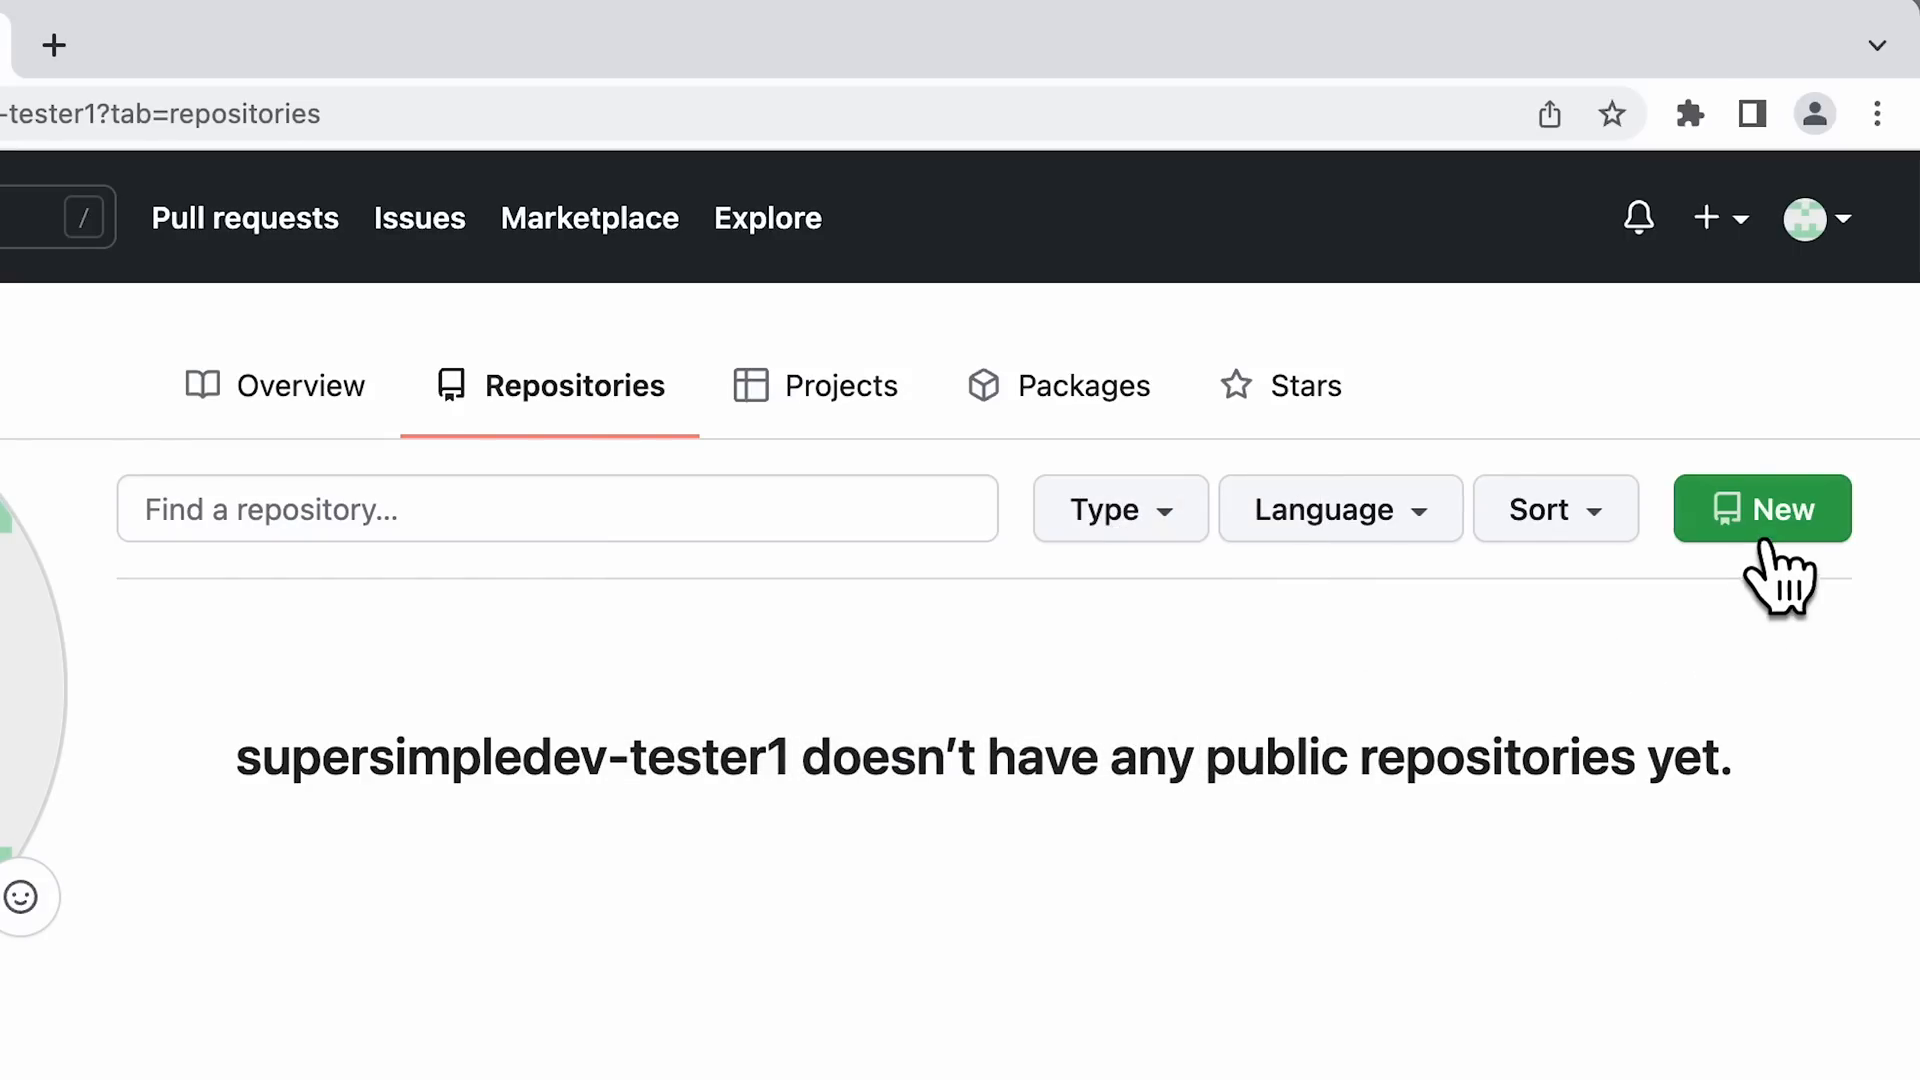
To get started, you need to have a GitHub account. If you don't have one, sign up at GitHub. Once you’re logged in, navigate to the top right corner and click on your profile icon. From there, select 'Your repositories' to create a new repository.
When creating a new repository, you’ll need to provide a name. This can be anything that helps you identify your project, such as "my-simple-website". Make sure to set the repository to public, as GitHub Pages is free only for public repositories. After setting this up, click on "Create repository".
How GitHub Pages Works
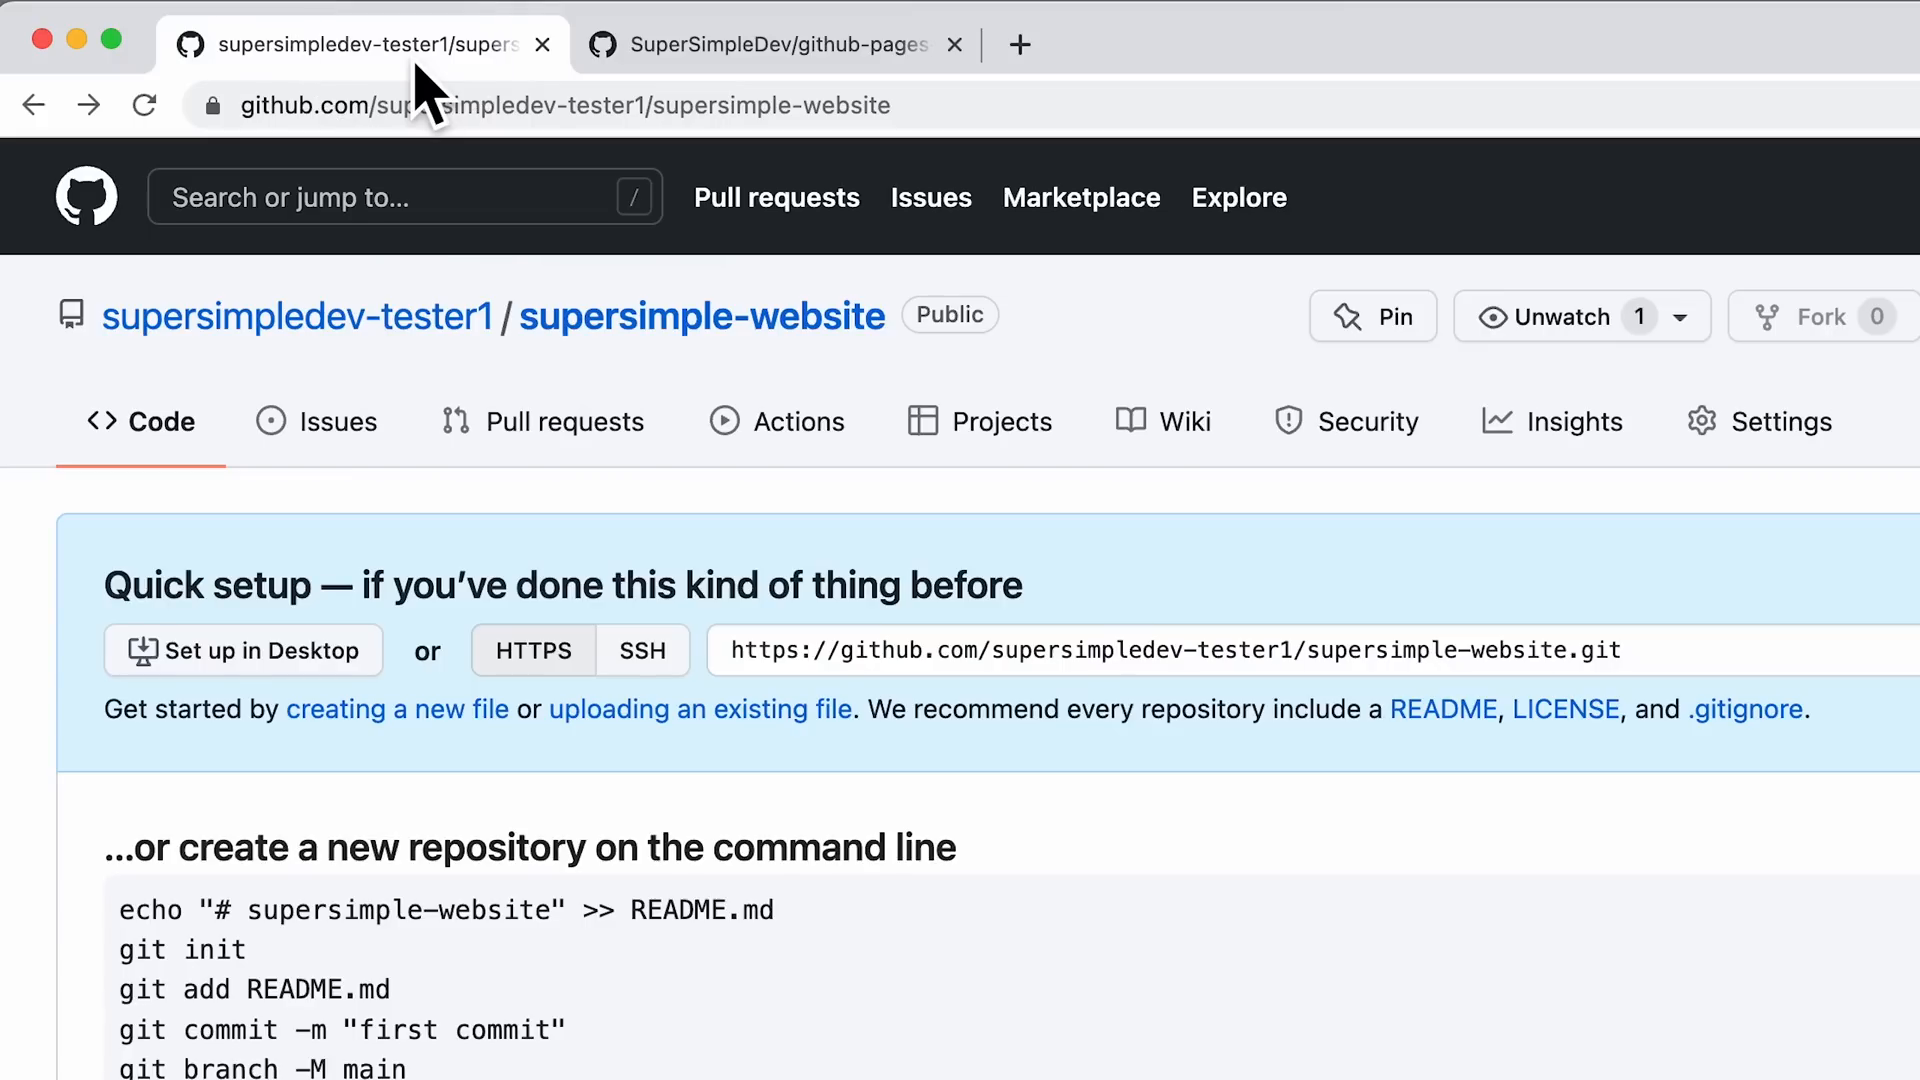
After creating your repository, you will need to upload your HTML and CSS files. If you don’t have a project ready, you can use a sample website. You can download the sample project from the link provided in the reference section. Once you have your files ready, navigate back to your GitHub repository and click on the “Upload files” button.
Make sure to drag and drop the HTML files directly into the repository, avoiding uploading them within a folder unless necessary. Once uploaded, scroll down and click “Commit changes” to save your files.
To ensure your website loads correctly, it’s essential to have an index.html file. This file acts as the homepage of your website. If you don't have one, you can rename your main HTML file (like YouTube.html) to index.html. To do this, click on the file, edit its name, and save the changes. After a few moments, GitHub will publish your changes, and your website will be live!
2. Set Up a Domain Name 🌍
Having a domain name makes it easier for users to access your website. Instead of using the default GitHub Pages URL, you can purchase a custom domain name, like "mywebsite.com". This section will guide you through acquiring a domain name and linking it to your GitHub Pages site.
Get a New Domain Name
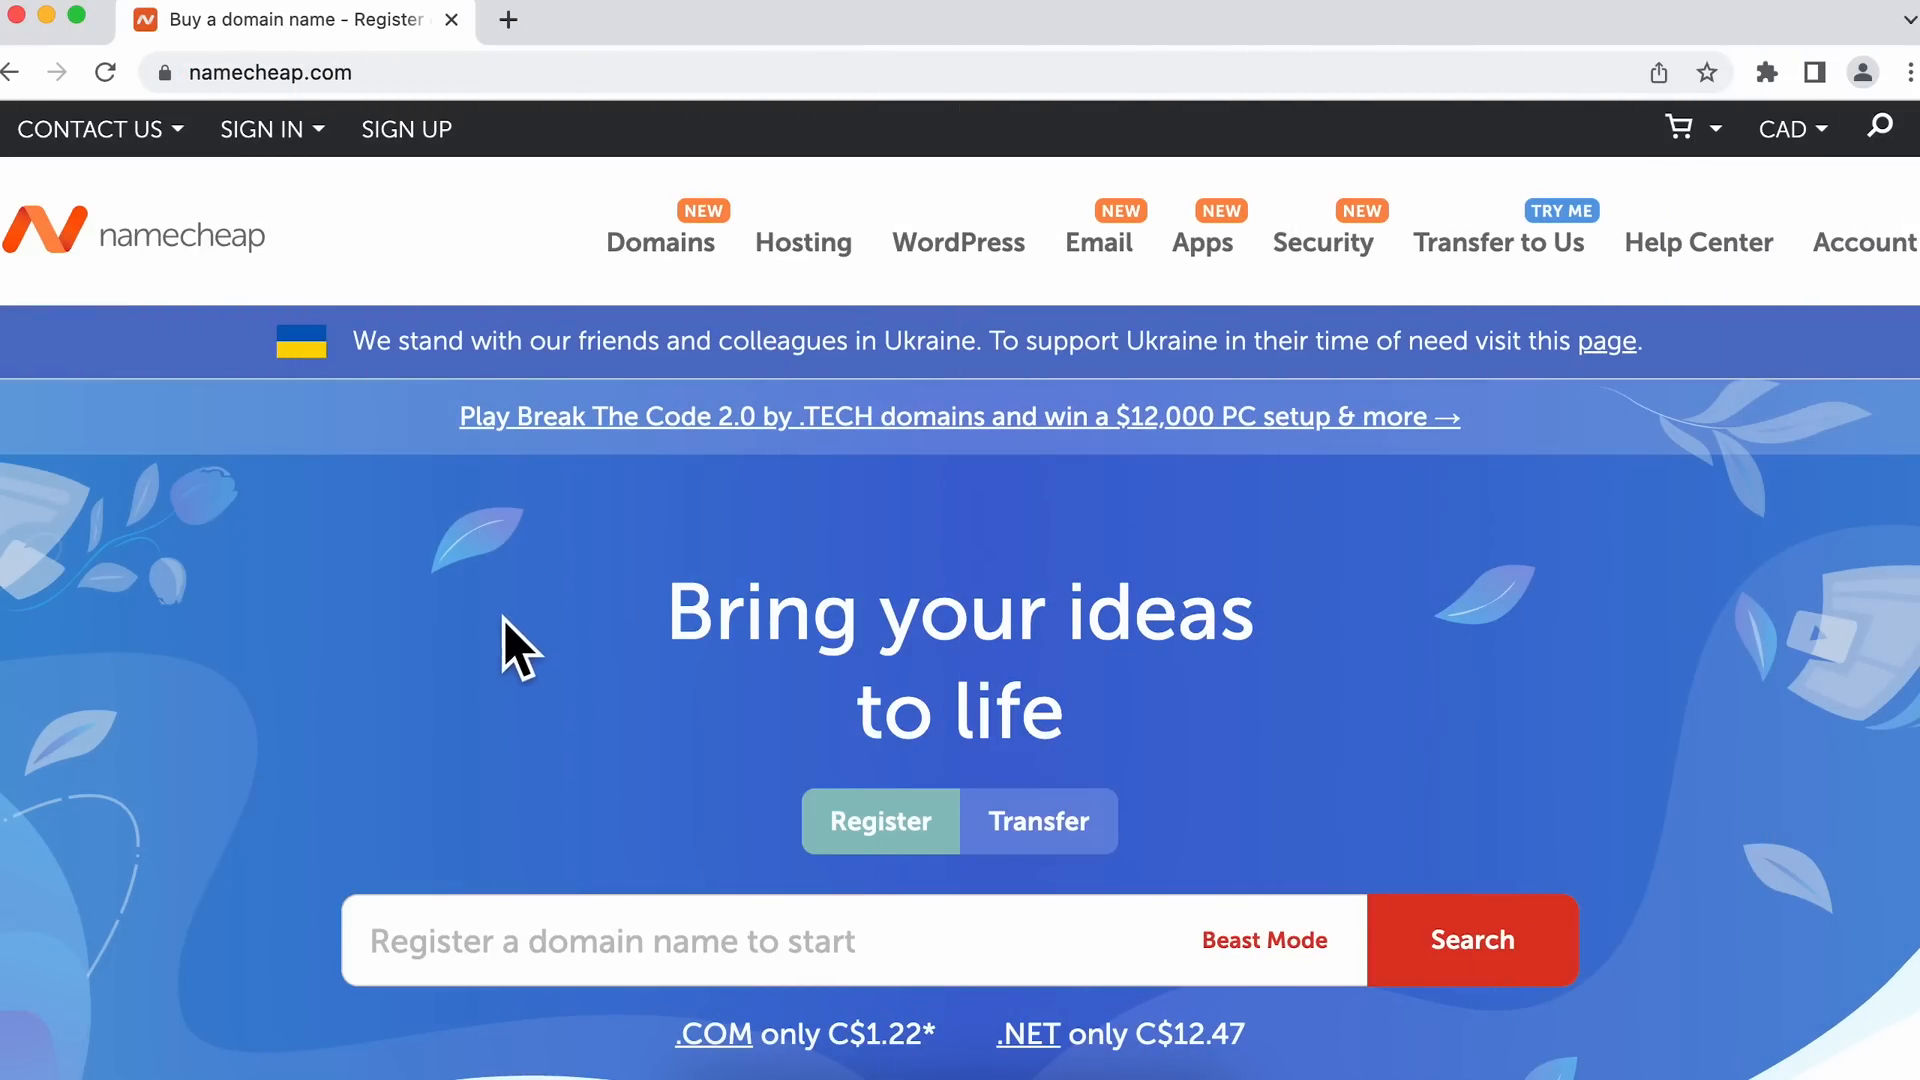
To get started, visit a domain registrar like Namecheap. You can search for the desired domain name to see if it’s available. Domain names typically cost between $10 to $15 per year. If the name you want is already taken, consider changing the extension or modifying the name slightly.
How the Internet Works
Understanding how the internet functions is crucial when linking your domain name to GitHub Pages. When you enter a URL in your browser, it communicates with a web server to retrieve files. Each device on the internet has a unique IP address, which serves as its identifier. Your domain name will need to point to the IP address of GitHub Pages for it to work correctly.
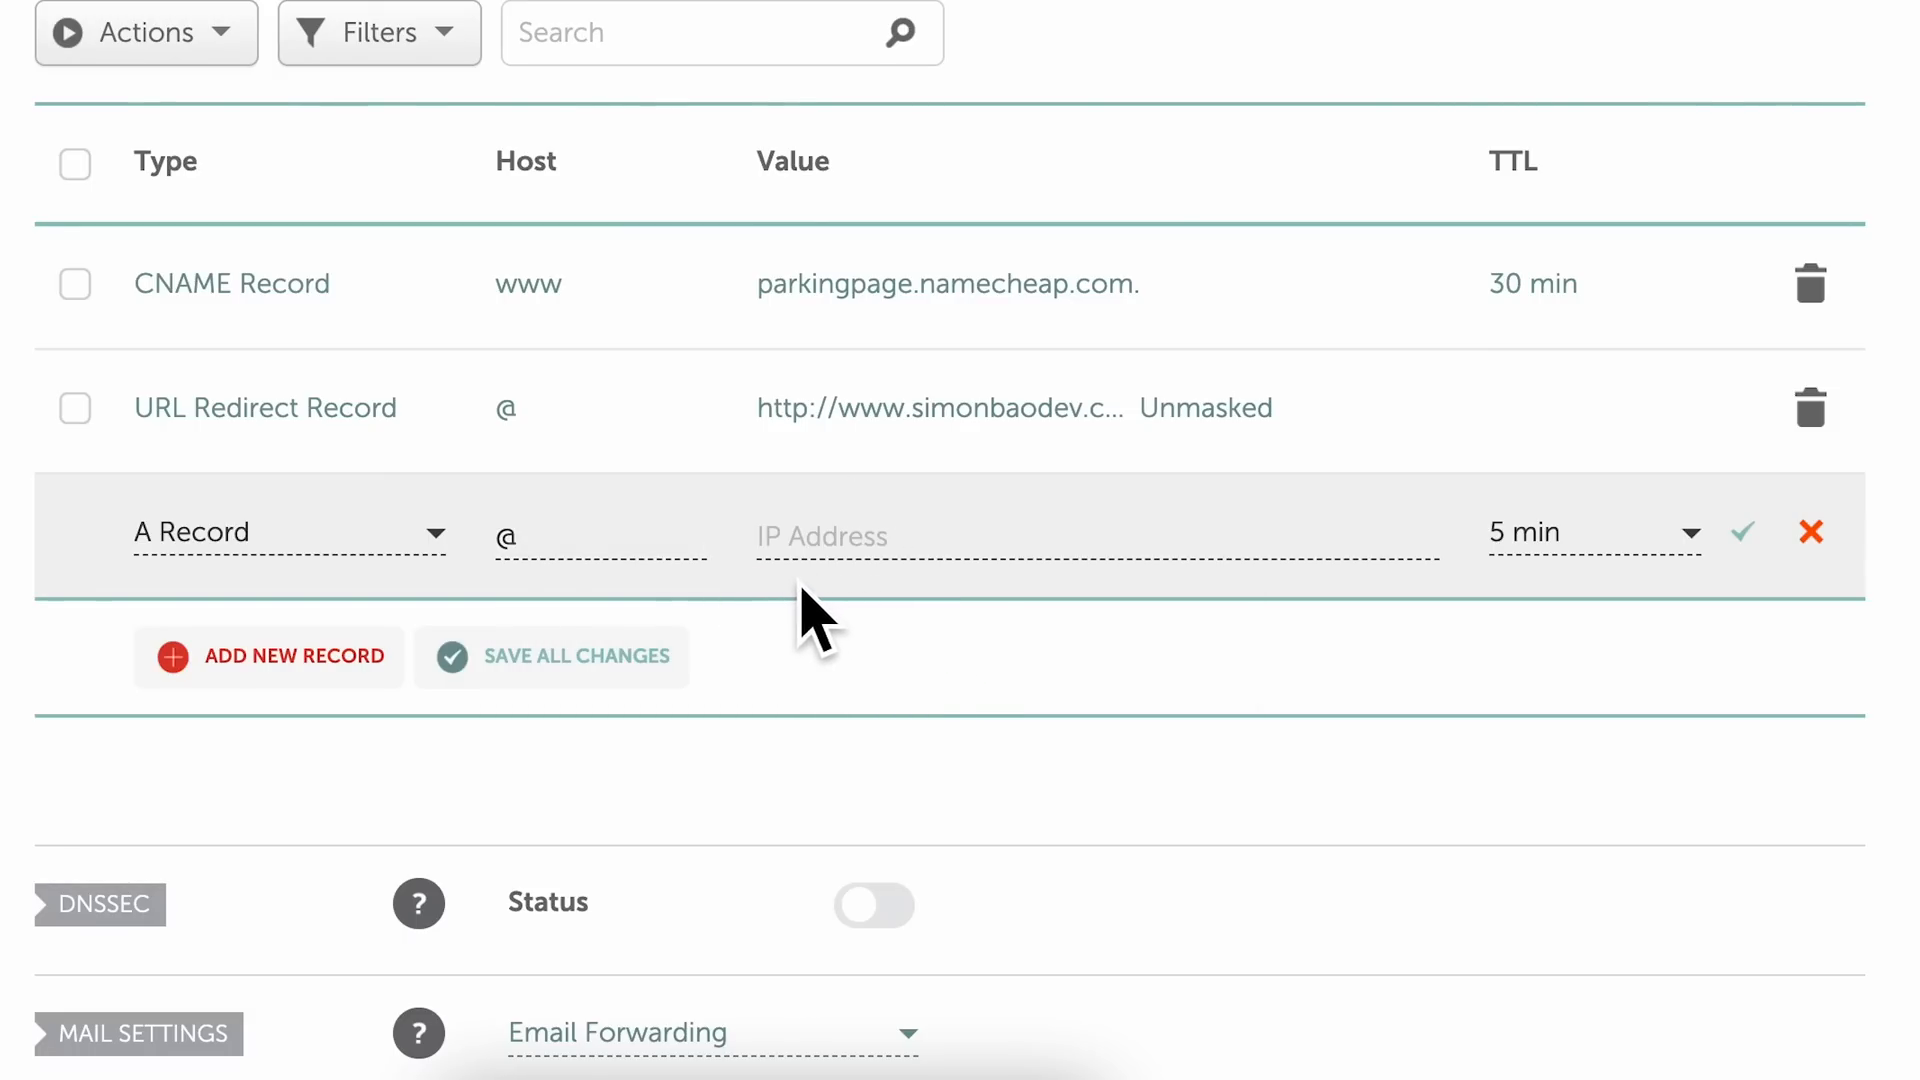
Set Up DNS A Records
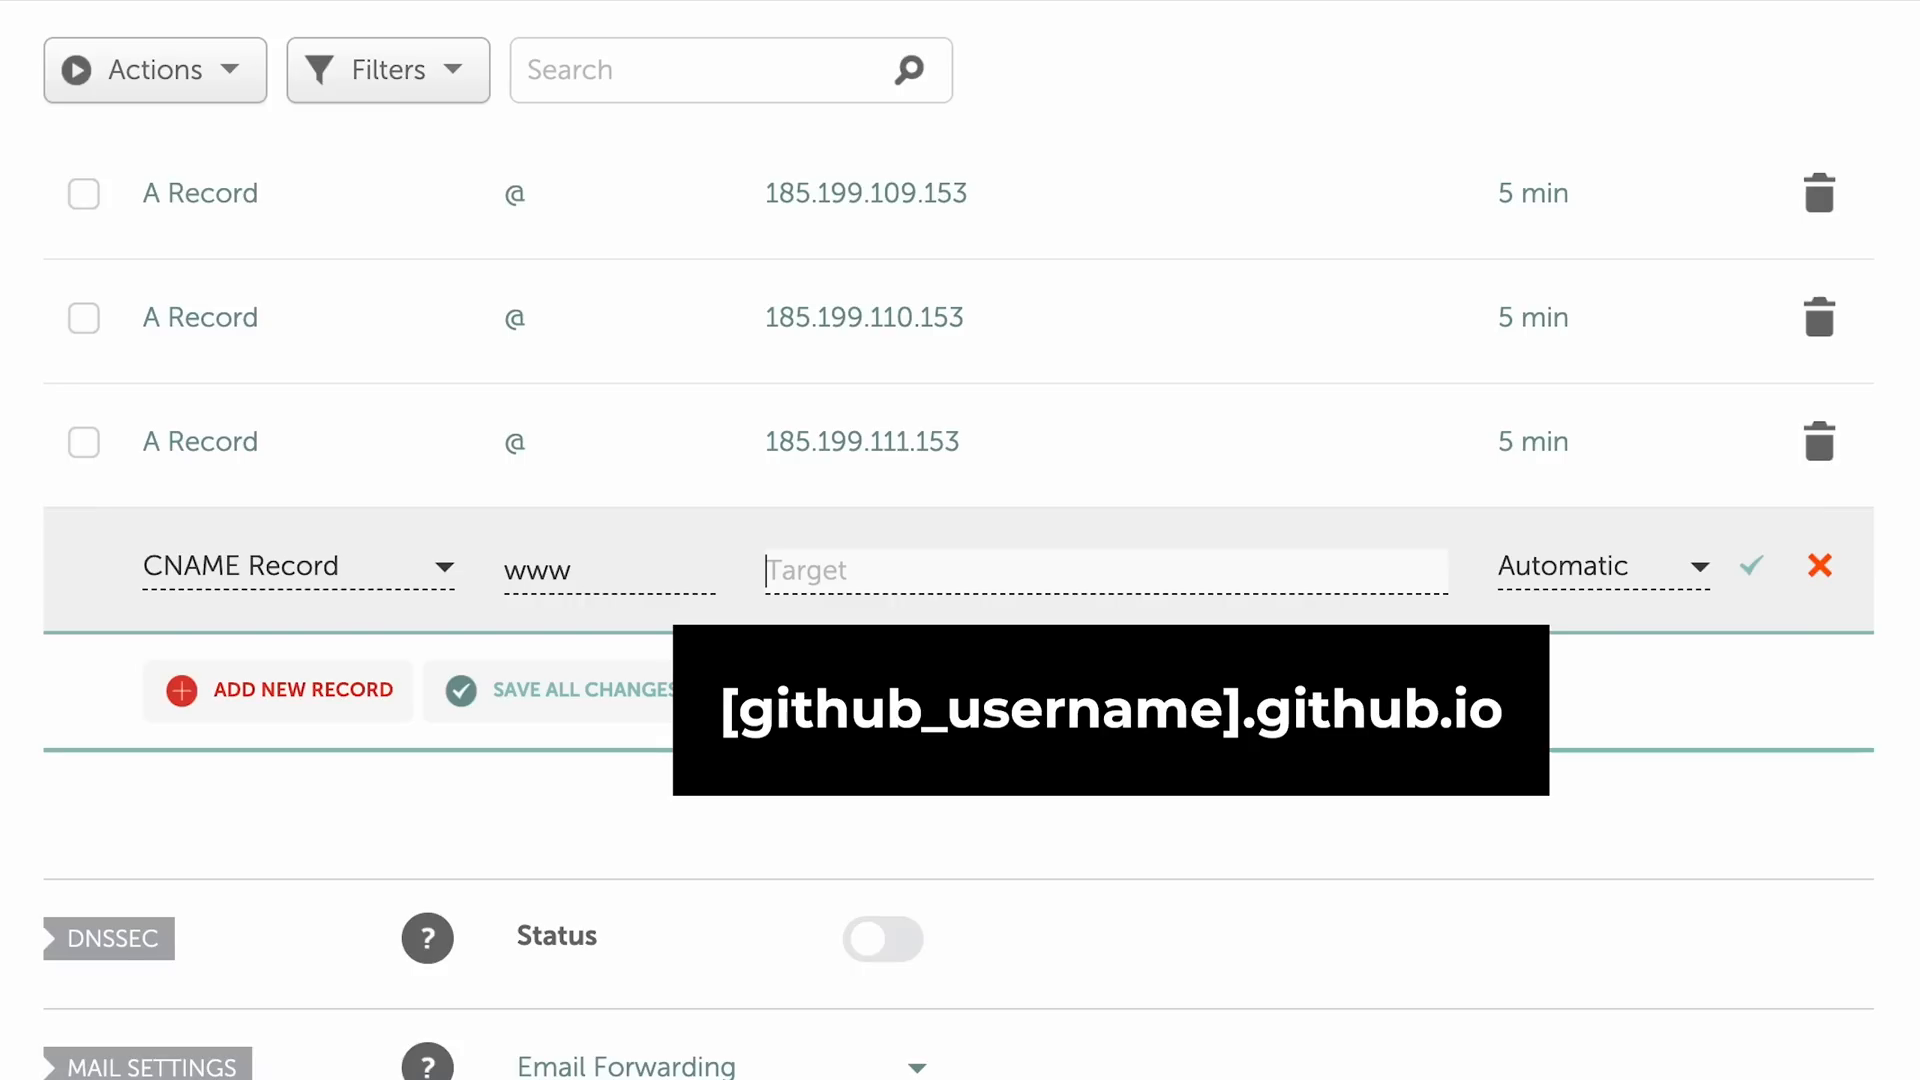
To link your domain to GitHub Pages, log into your domain registrar and navigate to the DNS settings for your domain. Here, you’ll create an A record that points to the IP address of GitHub Pages. You can find these IP addresses by using a DNS lookup tool. Enter your GitHub Pages URL (username.github.io) to retrieve the IP addresses.
Find the IP Addresses of GitHub Pages
Once you have the IP addresses, return to your DNS settings and add a new A record for each of the IP addresses. Set the time-to-live (TTL) to 300 seconds for quick updates. This process links your domain name to GitHub’s servers, allowing users to access your site through your custom domain.
Set Up www Subdomain with CNAME Record
In addition to the main domain, it's recommended to set up a www subdomain. This is done using a CNAME record that links the www version of your domain to your GitHub Pages URL. This ensures that both "mywebsite.com" and "www.mywebsite.com" direct users to your site.
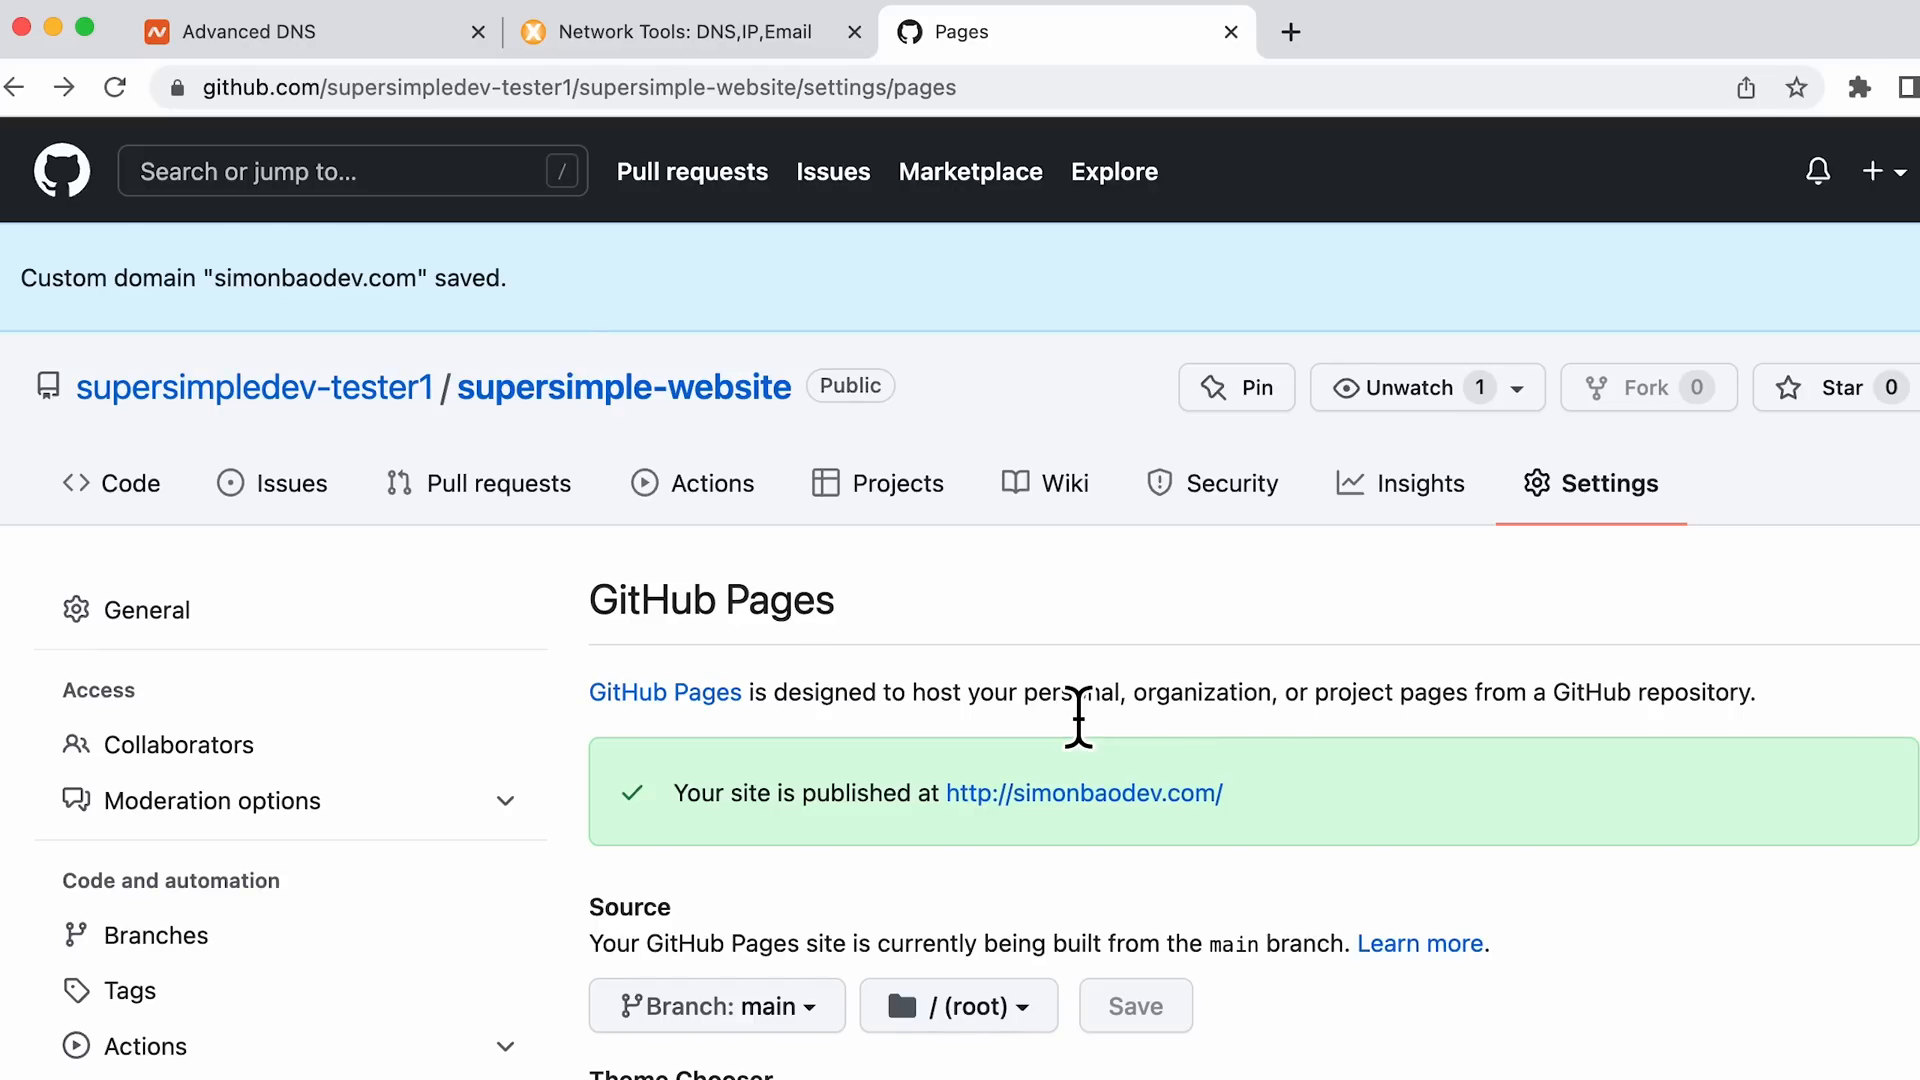
Link Our Domain Name in GitHub Pages
After setting up your DNS records, navigate back to your GitHub repository settings. Under the Pages section, enter your new domain name and save the changes. Keep in mind that DNS updates might take up to 48 hours to propagate.
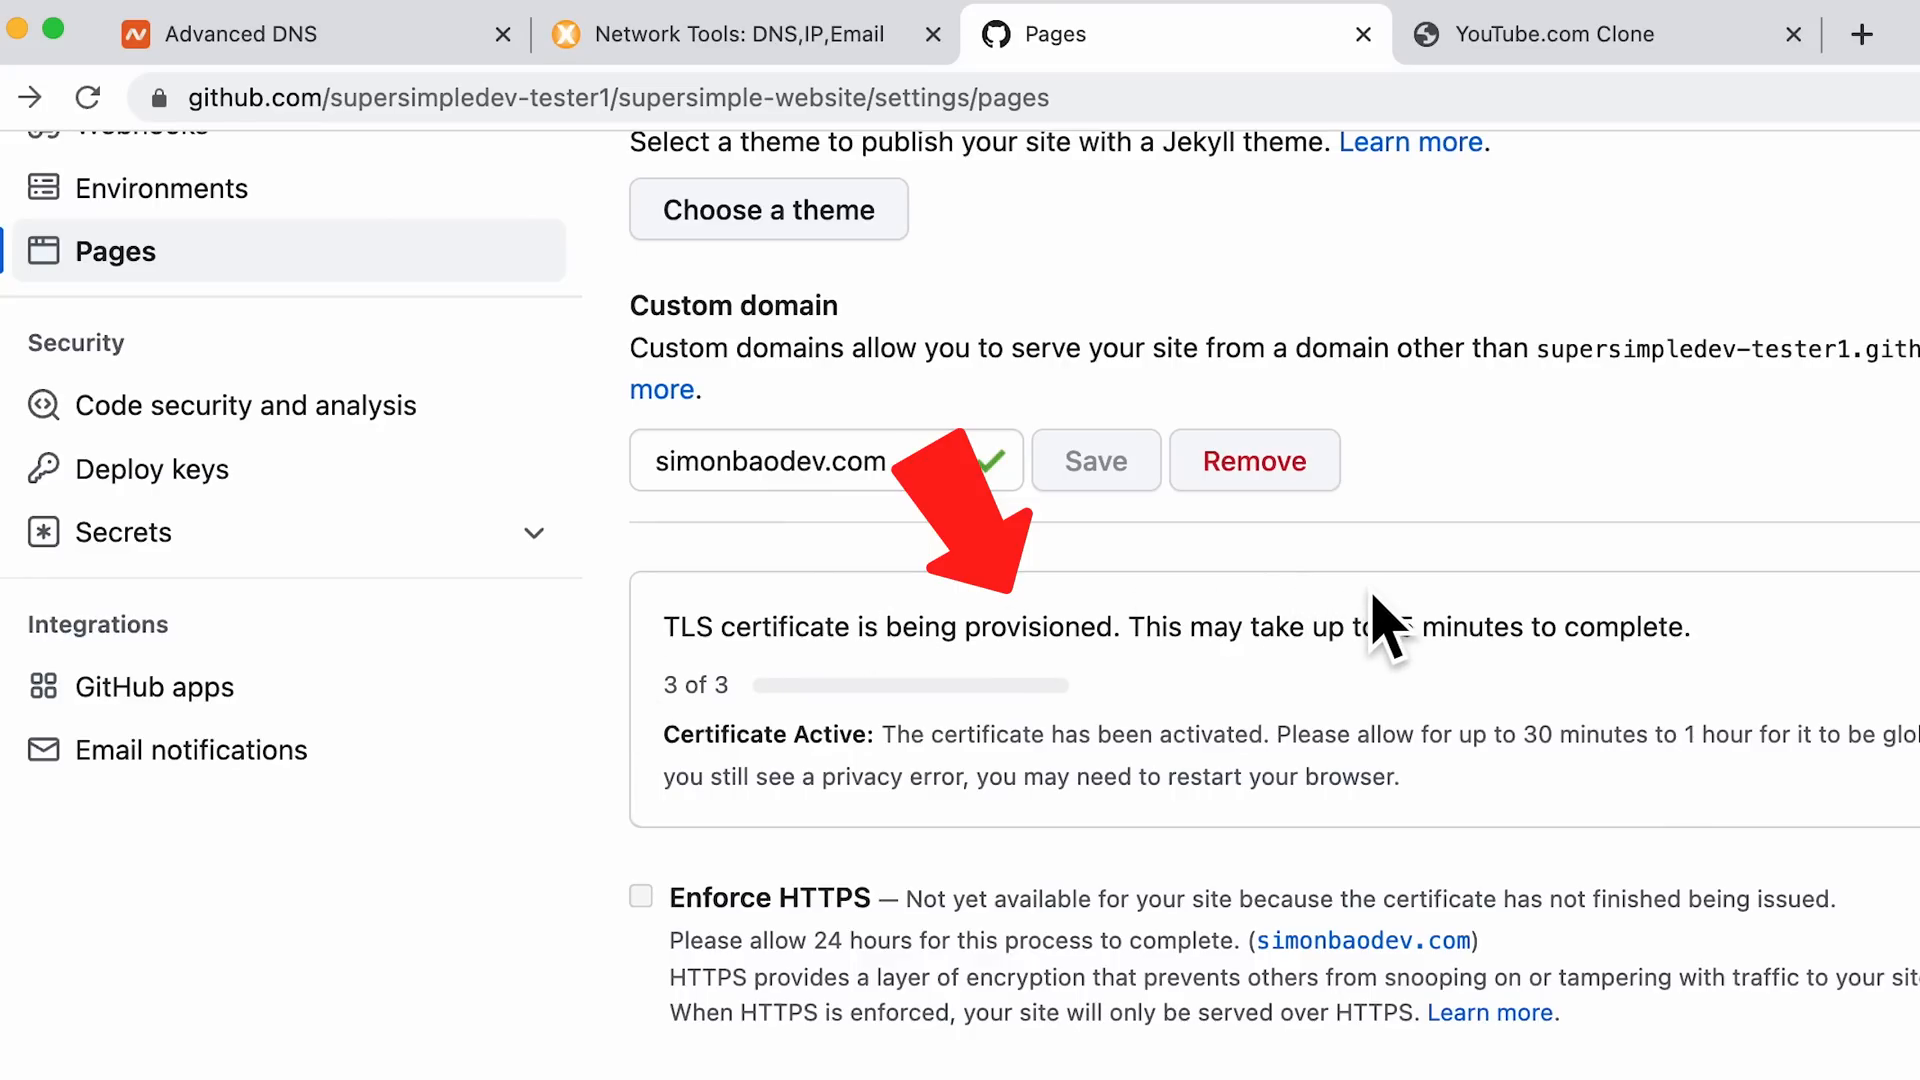
Set Up HTTPS for Free in GitHub Pages
To secure your website, you should enable HTTPS. This encrypts data between your browser and the server, protecting user information. In the GitHub Pages settings, check the box to enforce HTTPS. Once GitHub completes the setup, your site will be secure, indicated by a padlock icon in the browser.
Thanks for Watching! 🎉
Congratulations! You've successfully learned how to upload your HTML website online using GitHub Pages and set up a custom domain name. Now you can share your website with the world using a professional-looking URL. For more resources, consider checking out our WhatsApp Channel or Contact Us to further enhance your web development skills.
Feel free to leave any questions or comments below, and happy coding!
