


Intro 🎉
Take a look at these creators on Instagram and TikTok; they're getting hundreds of thousands of views, if not millions, from these short videos that take them probably five minutes to create. Can you guess how much they're making per month? Pause the video, drop a comment with your guess, and I'll pin the person that gets it right. I'm waiting!
We're talking between ten thousand to thirty thousand dollars monthly, depending on how they monetize their channels. What if I told you that you can create 1,000 short clips like these in just 20 minutes and monetize social media accounts to literally retire yourself from home? In this blog, I'm not only going to show you how to create boatloads of these viral short clips but also how you can easily scale your brand and monetize these channels quickly using a secret method to schedule posts everywhere with one click.
I've used it for almost every single one of my businesses on social media, and it's absolutely crazy! You're watching how to Ai, and before we get started, I've also made an AI tool cheat sheet with 200+ AI tools categorized after best use case and price. It's free, so just grab it in the description below.
Generating the Video Topics 📝
We're going to use two AI tools to make shorts and automate the process. The first tool we're using is, of course, ChatGPT. And don't worry, you won't have to pay for the Plus version; I've made sure that this method can be used by literally anyone, regardless of financial situation, education, or knowledge in online business.
To access ChatGPT, you need to create an account. Once you've done that and logged in, you'll see a screen that looks somewhat like the one shown in the video. However, if you're using a free account, you might not see the Plus icon, which is visible only because I've paid for the subscription. But don't worry, you still have access!
Our goal is to ask ChatGPT to generate 50 sets of facts that will consist of various topics or facts for the shorts, such as psychology, motivation, relationships, boy-girl topics, and productivity to ensure a variety of content. The main goal is to find topics that are easily relatable and especially shareable, as many of these platforms push content that folks share with each other.
The prompt you will be using must be refined through testing because the secret of these AI tools is that when you enter a perfect prompt, you get the desired result or the closest to it. This might require some testing back and forth. Once we type in the prompts, we simply click "Send message" and let ChatGPT generate the facts.
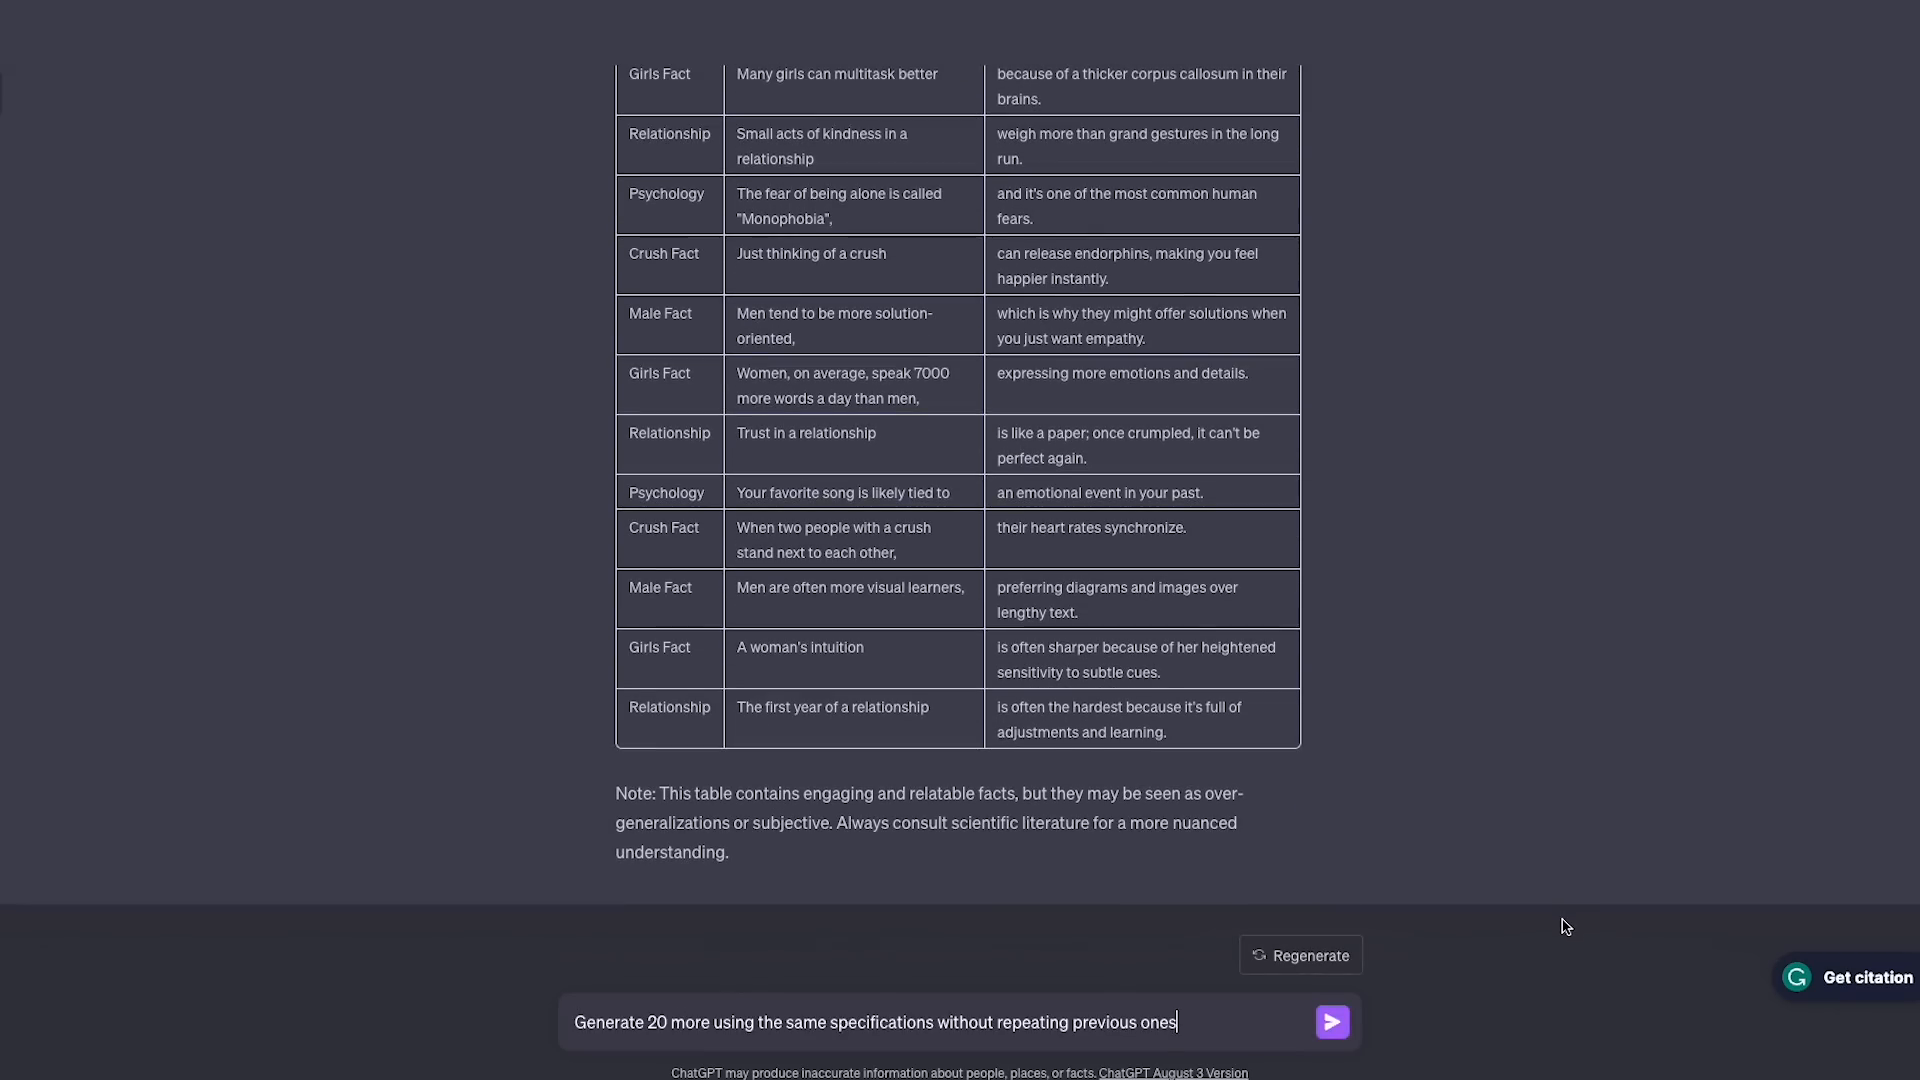
As a result, we have column one for different types of facts and column two for the starting point. You can adjust this number as per your requirements, but don't go for too big a number. To create more prompts, simply copy and paste this second prompt: "Generate 20 more using the same specifications without repeating previous ones." This way, you won't have to worry about creating any repetitive videos.
Designing the Clips 🎨
Now let's just start with these 20 and proceed. The method I'm going to show you next will let you automate the whole editing process so that you can create a lot of videos. First, we just have to copy the entire table and move on to the next tool. With only a few changes, we'll be able to create 50 videos in no time.
Let's visit canva.com. If you haven't already, sign up here for a free account. After logging in, you'll see a screen that looks like this. Once you are on its home page, click on the search bar in the center and type "YouTube shorts." Select the YouTube shorts template and then choose "Create blank template" to create a new template.
For this, we'll just have to make a few adjustments to prepare for automated video creation. First, you'll need to add a video background. Click on "Apps" at the bottom left, then scroll down or use the search bar to find videos. In the search bar, look for something like "beach" or "sunset" to find a calming ambient background similar to the example.
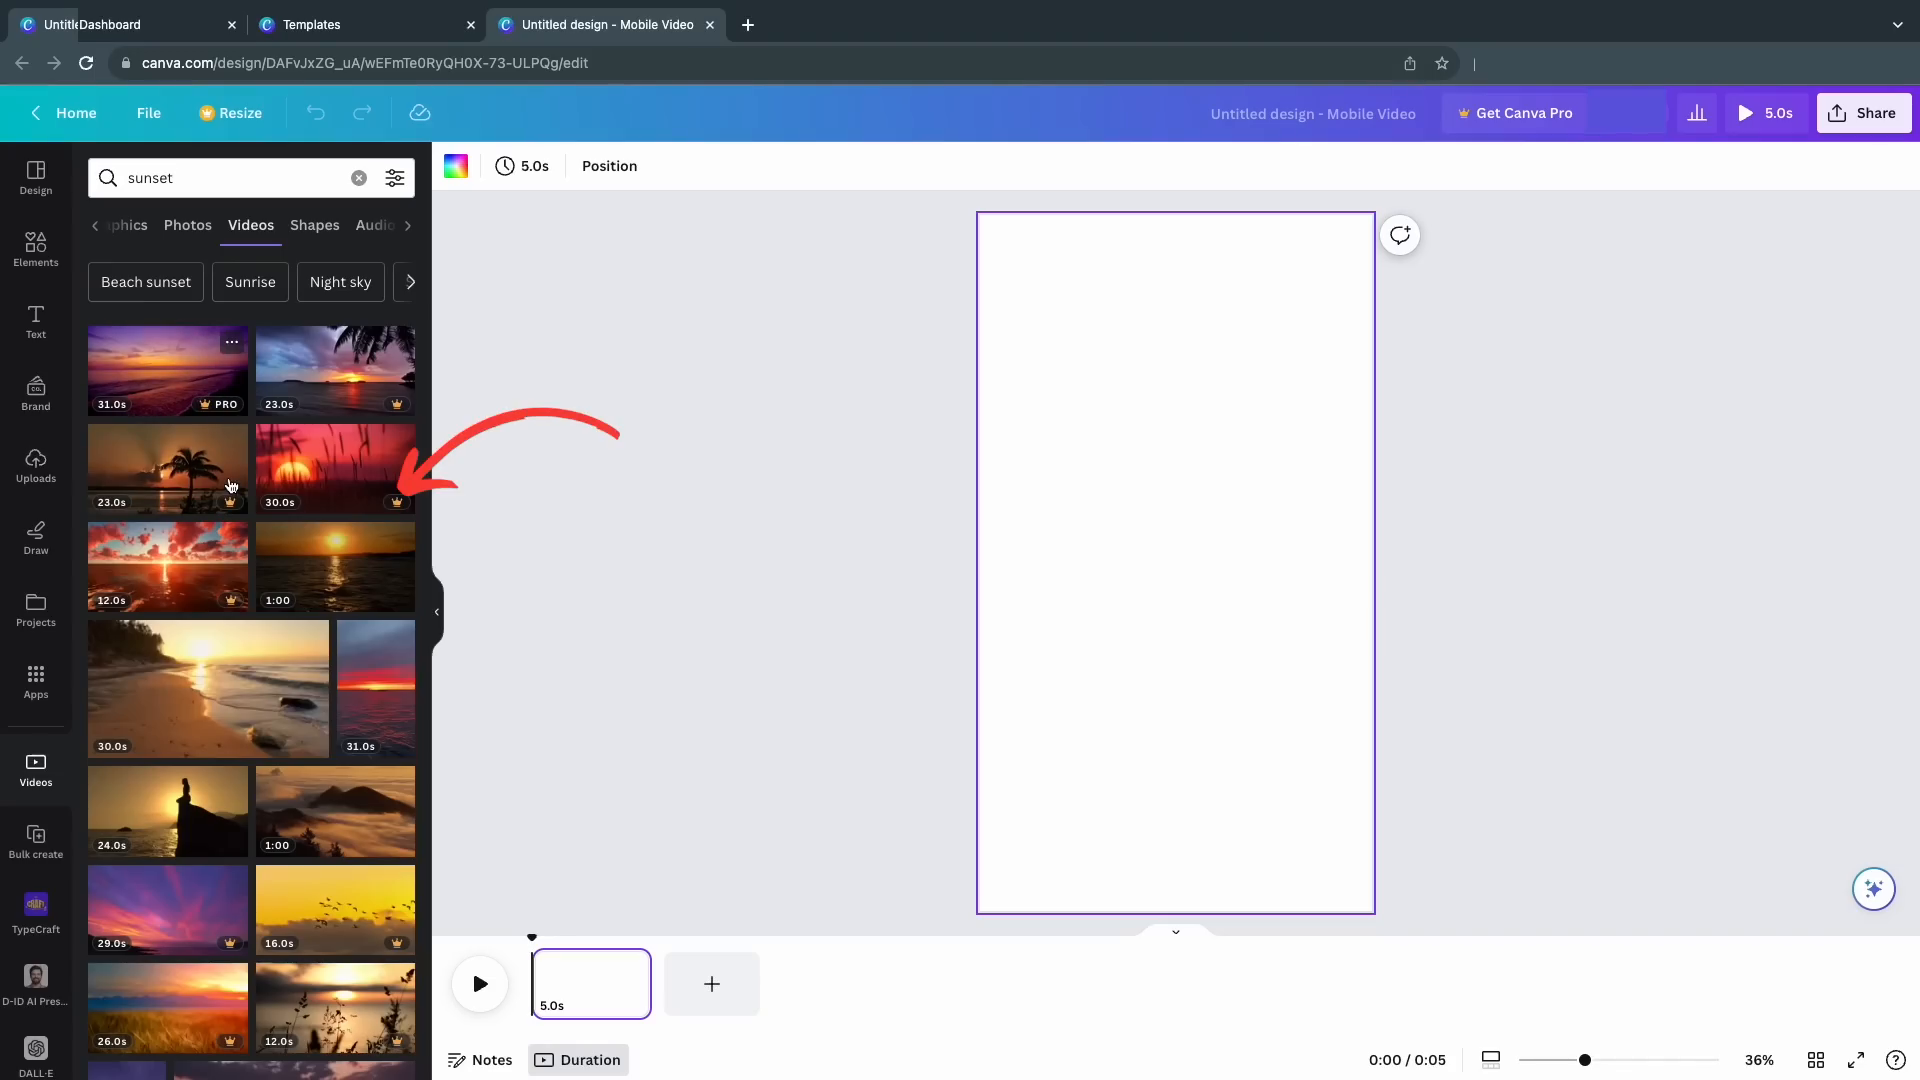
Let’s select the video and proceed. If you come across videos with a crown icon, meaning they require Canva Pro, you'll need to set up a free trial for the Pro version. A great tip here is to start the trial and then cancel it immediately; you'll get one month for free even if you cancel it directly. Many videos have crowns because they may not be accessible without activating the trial.
However, if you haven't activated the free trial, you'll find videos like the one we're using that are free to use. They might not look as good, but it doesn't matter too much for this video anyways. Always choose a video that works well as an ambient background and won't distract viewers from the text.
Bulk Creating the Clips 📹
Now, the next step is creating the text overlay. First, let's adjust the video duration to about five to six seconds because longer videos than that might not be engaging enough for these short-form platforms. Just drag the video down to around the six-second mark.
Next, remove any background noise or music from the video. Click on the video, locate the volume icon in the top right corner, and drag the volume all the way down to mute it. Now let's add text before connecting it to our data for automated video creation. Go to the text section, add a header, and select your desired text style. It'll get automatically placed on the canvas.
This text is for the topic. Replace the existing text with "topic" and move it to your desired location. Now let's dial the text. Double-click on the text to select it all, click on color at the top, and change it to white. Add a background by clicking on effects and then selecting background. It usually defaults to black, but if not, just scroll down and choose black. This will be your topic text at the top of the video.
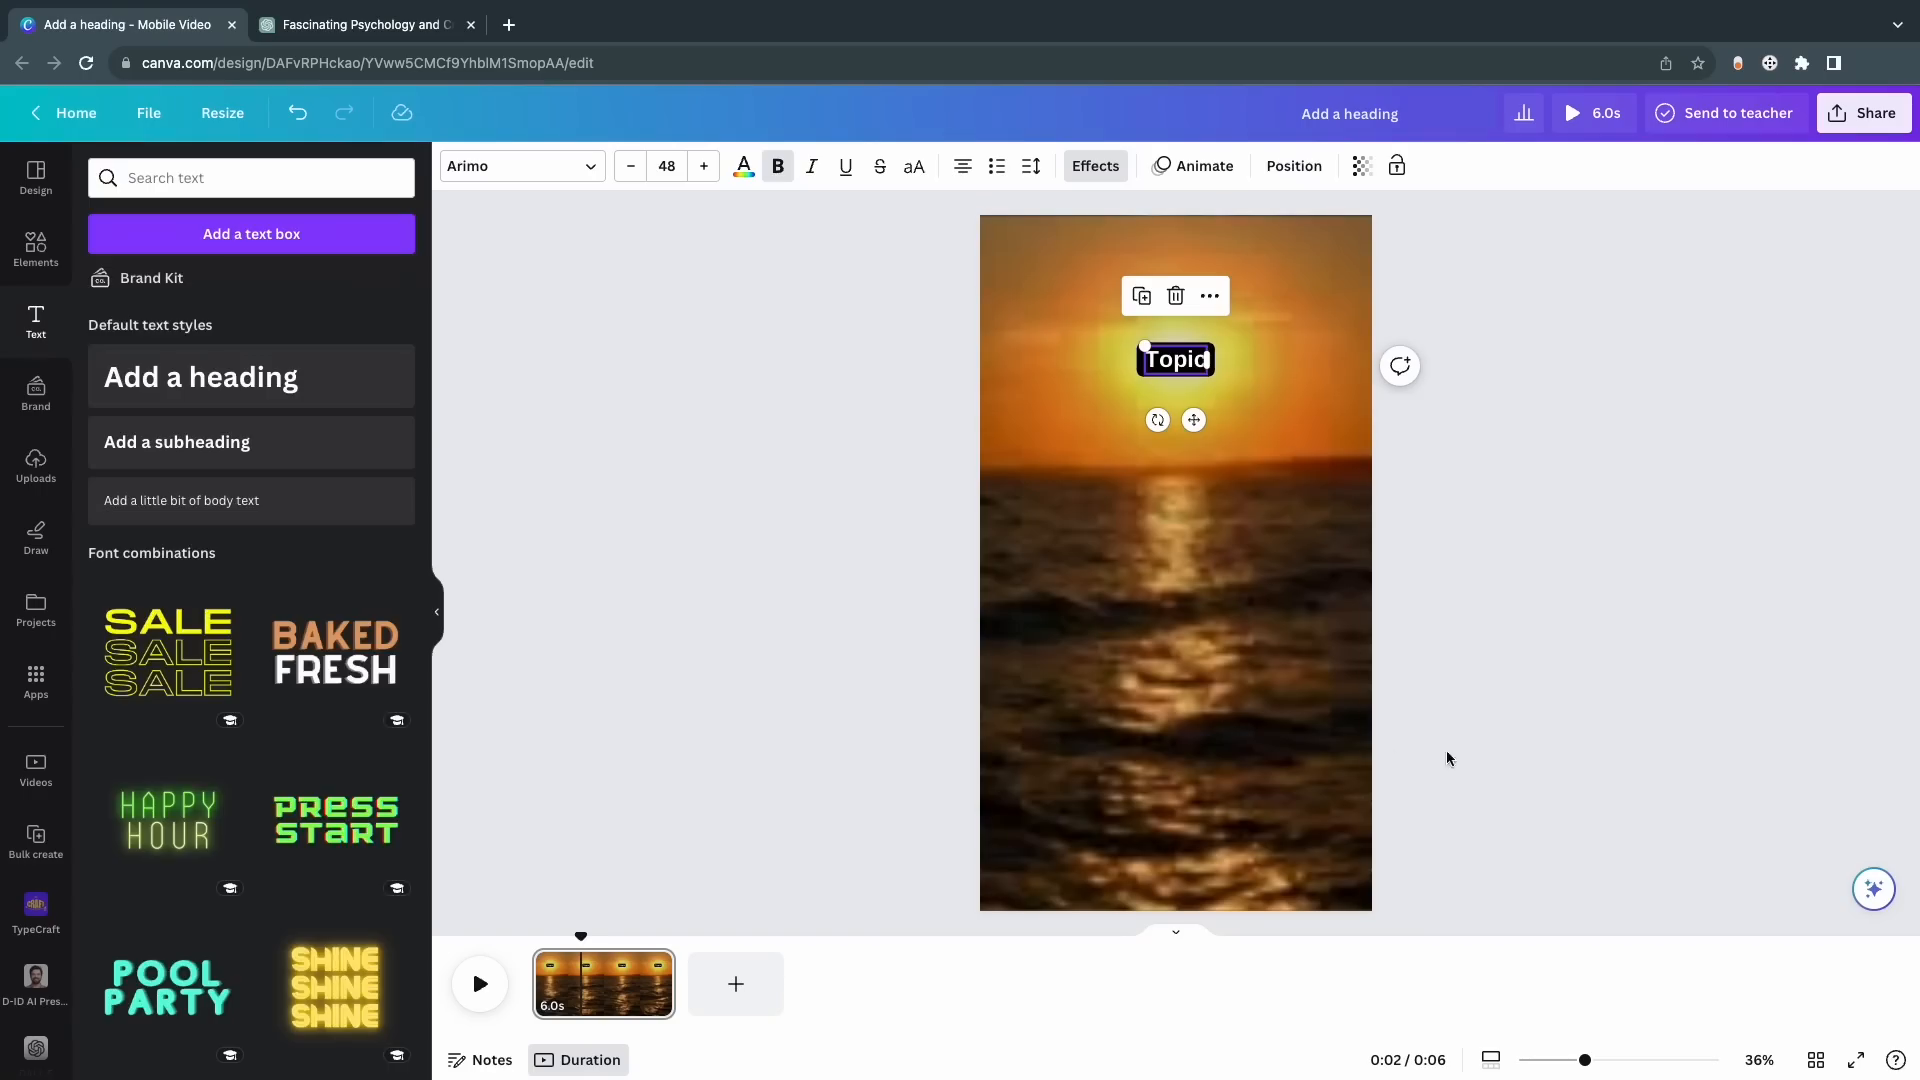
If you prefer, you can also change the font. Feel free to choose any font that suits your preferences. If you're on the Pro trial, you can even upload your own fonts or explore the Google font library for a wide selection or branding.
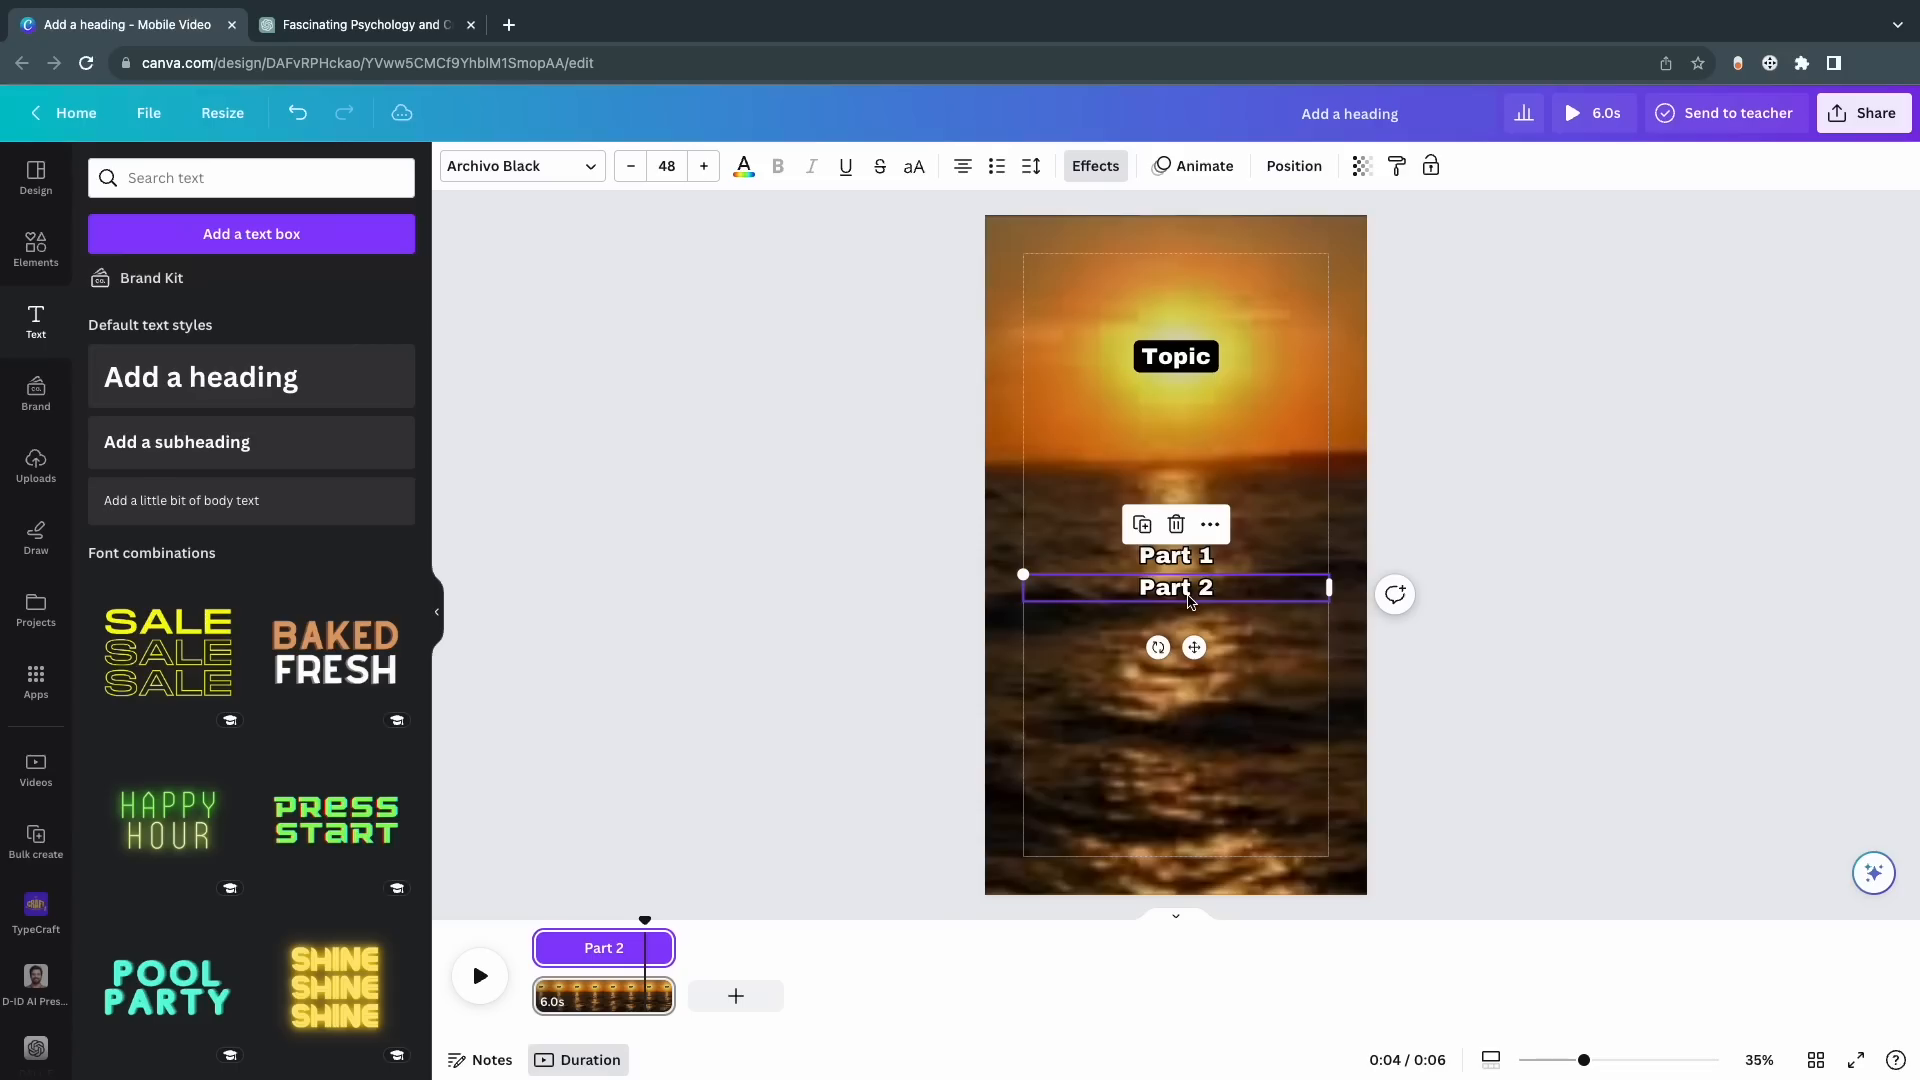
Next, let's duplicate the text. Click on it and select duplicate. Drag the duplicated text and put it below; this will serve as our part 1 text. Go ahead and write that in there. Just double-click on it to edit and write "part 1." Remove the background by clicking effects and choosing none. However, it's good to add an outline to make it a little more noticeable. You want to click on outline, set the color to black, and increase the thickness to around 75 to 95; this is completely up to you to decide.
Now we also need the part 2 text. Just duplicate the part 1 text like before by clicking on it and selecting duplicate. Now listen carefully because this is important: you want to place the text right a little bit under the part 1 text. We're going to want the text later on to show up in the same spot all the time, but this step is necessary later on for the automation process as you'll see soon.
Results 📈
Since the part 1 and part 2 text can vary in length and most of them will probably be a lot longer than just this little box, click and drag from the edges of the purple boxes of part 1 and part 2 text, aligning them with the purple outline around the entire video. If you don't do this, longer text that gets inserted later on will not fill out the screen in the right way. This ensures that text wraps within the box and doesn't overflow the video's edges, making it unreadable.
Now let's change the timing for when our two sets of text appear in our video. We don't want both part 1 and part 2 to display at the same time. To manage this, right-click on part 1 and select show timing. This will bring up a timeline view at the bottom, allowing you to adjust when each part of the text appears. For a six-second video, it's a good idea to have part 1 displayed for most of the video's duration and then have part 2 appear for a shorter period. This encourages viewers to re-watch the video, leading to longer retention and higher watch rates, which is super important in order to make your video go viral.
You can set part 1 to show for say three and a half seconds, which you can also adjust as needed, and do the same for part two, having it appear at three and a half seconds into the video. Now we're finally at the crazy part! Not many people know of this feature on Canva, and it's called bulk create.
It's time to link our text with the data which we'll be using the tool for. Click on "Apps" at the bottom left of your screen, and you should find the tool there. If not, you can also use the search bar to find it. The feature will prompt you to input your data. Because we let ChatGPT create the facts in a table format, we can copy and paste it directly. So just go back to ChatGPT, copy the data, return to Canva, click "Enter data manually," and select the top left cell in the first column and paste your text. It will automatically format the text into topics, part 1, and part two just like we want it.
Bulk Scheduling on All Platforms 📅
Now click done. Next, let's connect the data to the specific elements in your editor. Here, right-click on the topic text and choose "connect data," then select "topic." Once again, you'll see these clams around it, which means your data has now been connected. Just repeat this process for part one and part two, but with the right source.
With everything connected, you need to move the part 2 text and put it over part one because we want both sets of text to display one after the other in the same spot. Part 1 should be shown for the first three and a half seconds, followed by part 2 for the remaining two and a half seconds. When it's lined up correctly, click on continue down to the left.
Now when you hit generate, it will bulk create all your videos that ChatGPT provided. You might encounter some weird glitch that it only generates 49 videos, but it won't affect the actual videos except you lose one video. I don't know why this happens to be honest. Once it's finished, you'll be able to quickly export these videos by clicking share in the top right corner and then download. Make sure to select "download Pages as separate files." Pretty self-explanatory; you get all these videos downloaded as separate files.
And that's pretty much how you can create these videos. And if you want to go the extra mile, use some online software to bulk edit these videos and add a trendy sound to all of them. This will boost the engagement of these videos a lot and make them more captivating than before. It's probably possible in Canva, but we got to keep going so the video doesn't become too long. The result will look something like this.
However, for these short clips, the most important part is not how you create them but what you do with them. Many creators will just leave you here and let you proceed on your own, but I'm going to show you how to utilize this method to the max and easily grow several accounts to over 100,000 followers in one month.
We'll want to use a very special website called Buffer.com. This is every content creator's dream tool! It's the easiest way to schedule all your posts on all social platforms like Instagram, TikTok, Facebook, Twitter, and YouTube with one click, meaning you don't have to do it manually on every channel.
What you want to do is sign up for their free trial as well and create an account. After that, connect all your social media accounts to Buffer so that it ends up looking like this. It's a pretty repetitive straightforward process, so I won't show that now. Anyways, now you just want to go to your calendar and click on "create post." Simply choose which channels you want to upload to and insert your clip, fill out some captions, and then you are literally ready to publish it this easily on all your platforms.
I won't be able to post something now for obvious reasons, but you just press share now, and it automatically does it for you. Congratulations if you got this far; you've just automated your whole content creation process and will now be able to surpass your competitors super easily!
If you post a lot of these videos every day on every platform and actually stay consistent, you'll without a doubt get incredible amounts of traction and views. The video has already gone too long now, but if you want to learn how to monetize these channels later on when you've gained a decent following, like the video and leave a comment to let me know.
I've linked all the websites used below so you can access them quickly. You can join our WhatsApp Channel for more tools and resources, We'll also help you if you have any questions. Have a great one!
